There’s something genuinely satisfying about stepping onto your patio and snipping a fresh pepper off your own plant. Whether you’re craving the smoky heat of a jalapeño, the fiery punch of a habanero, or the sweet crunch of a bell pepper, growing peppers in pots makes it possible—even if your only garden space is a balcony or a sunny windowsill.
Peppers are natural candidates for container gardening. They love warmth, they’re compact enough to thrive in pots, and they produce abundantly when given the right conditions. For US home gardeners—especially those in apartments, townhomes, or anyone who’s short on yard space—peppers in containers are one of the most rewarding vegetable projects you can take on.
In this guide, you’ll learn everything you need to grow healthy, productive pepper plants in pots, from choosing the right varieties to harvesting your first homegrown peppers. Whether you’re starting from seed or picking up seedlings from your local garden center, these tips will set you up for a successful season.
Best Pepper Varieties for Pots
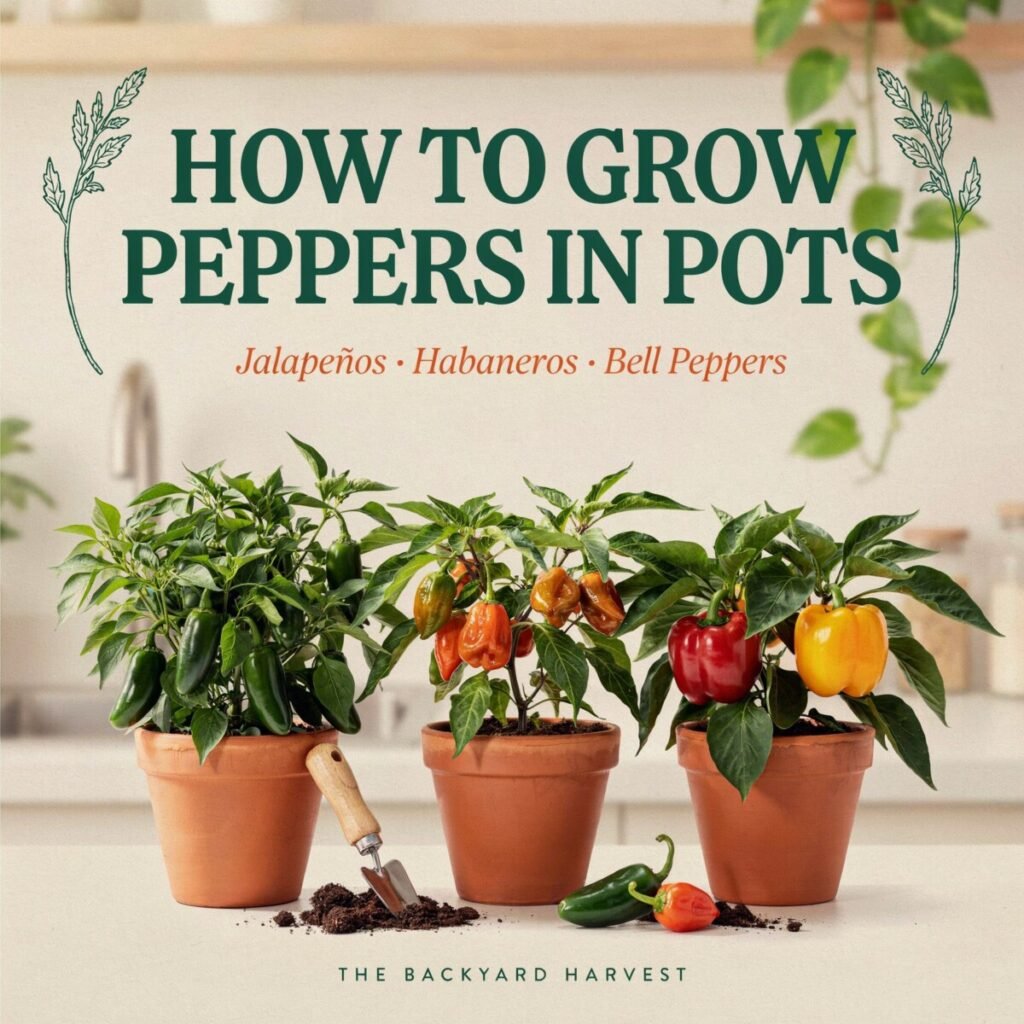
Not all peppers grow the same way, and understanding the differences between jalapeños, habaneros, and bell peppers will help you choose the right plants for your space and your taste.
Jalapeños
Jalapeños are the gateway pepper for many American gardeners. They’re moderately spicy (2,500–8,000 Scoville Heat Units), versatile in the kitchen, and relatively easy to grow. Jalapeño plants tend to stay compact—usually reaching 2 to 3 feet tall—which makes them an excellent choice for container gardening. They produce heavily throughout the summer and into early fall.
Habaneros
If you like serious heat, habaneros deliver. Ranging from 100,000 to 350,000 Scoville units, these peppers are not for the faint of heart. Habanero plants are slightly more finicky than jalapeños and prefer warm, consistent temperatures. They grow 2 to 4 feet tall and produce small, lantern-shaped fruits that ripen from green to bright orange or red. Growing hot peppers in containers works well because you can move pots to shelter if temperatures drop unexpectedly.
Bell Peppers
Bell peppers are the sweet, mild cousin of the pepper family—zero heat, maximum crunch. They come in green, red, yellow, orange, and even purple. Bell pepper plants typically grow 18 to 24 inches tall in containers and need a bit more patience than jalapeños. They’re slower to produce, but the payoff is big, juicy peppers that are perfect for salads, stir-fries, and stuffing. Growing sweet peppers in containers is very popular among patio vegetable gardening enthusiasts because of their versatility in the kitchen.
When choosing between these three, consider what you’ll actually eat. A mix of all three gives you heat, flavor variety, and kitchen flexibility.
Choosing the Right Pot
The pot you choose can make or break your pepper-growing season. Here’s what to consider when selecting the best pots for peppers.
Pot Size
Size matters more than most beginners realize. For most pepper varieties, you’ll want a container that holds at least 5 gallons of soil (roughly 12 inches wide and deep). Larger peppers like bell peppers benefit from 7- to 10-gallon containers, while compact jalapeño varieties can do well in 3- to 5-gallon pots.
The bigger the pot, the more room pepper roots have to spread, which translates to healthier plants and bigger yields. Small pots dry out quickly and restrict root growth, leading to stressed plants that drop flowers and produce fewer peppers.
Drainage Is Non-Negotiable
Every container must have drainage holes at the bottom. Peppers hate sitting in soggy soil—root rot will kill a pepper plant faster than almost anything else. If your decorative pot doesn’t have holes, either drill some or use it as a cache pot (place a plastic nursery pot with drainage inside the decorative one).
Material Options
- Plastic pots: Lightweight, affordable, and hold moisture well. Great for hot climates where pots dry out fast.
- Fabric grow bags: Excellent drainage and air pruning for roots, which promotes bushier growth. They dry out faster, though, so you’ll water more often.
- Ceramic or terracotta: Attractive and heavy (great for windy balconies), but they’re porous and wick moisture away from the soil. They also get heavy when wet.
- Wooden planters: Provide good insulation for roots and look natural on patios. Make sure the wood is untreated or food-safe.
For most US home gardeners, dark-colored plastic pots or fabric grow bags strike the best balance of affordability, performance, and ease of use.
Best Soil for Potted Peppers
The pepper potting mix you use is one of the most important decisions you’ll make. Never use garden soil in containers—it compacts, drains poorly, and can carry diseases and pests.
What Makes a Good Pepper Potting Mix?
Container-grown peppers need soil that is:
- Well-draining so roots don’t sit in water
- Light and fluffy so roots can spread easily
- Rich in organic matter for steady nutrition
- Slightly acidic with a pH between 6.0 and 6.8
Recommended Mix Recipe
A simple, effective blend for potted pepper plants is:
- 60% high-quality potting mix (not garden soil)
- 20% compost (for nutrients and microbial activity)
- 20% perlite or coarse sand (for drainage)
You can also buy a premium organic potting mix designed for vegetables and add a handful of perlite to improve drainage. Some gardeners like to mix in a slow-release organic fertilizer at planting time to feed plants for the first few weeks.
What to Avoid
- Heavy clay soils or topsoil
- Potting mixes labeled “moisture control” (these hold too much water for peppers)
- Used soil from previous seasons (unless sterilized)
- Soil that smells sour or moldy
Invest in good soil from the start. Your pepper plants will reward you with stronger growth and better fruit production.
How Much Sun Peppers Need
Peppers are sun worshippers. If you want your potted pepper plants to flower, set fruit, and produce a worthwhile harvest, they need full sun for peppers—that means at least 6 to 8 hours of direct sunlight every day, and more is even better.
Sunlight and Fruit Production
Here’s the thing about peppers: more sun equals more peppers. Plants that get less than 6 hours of direct sun often grow tall and leggy, produce few flowers, and drop blossoms before they can set fruit. In the US, southern-facing exposures provide the most intense light. If you’re growing peppers on a balcony or patio, position your pots where they’ll catch morning and early afternoon sun.
Dealing with Extreme Heat
In southern states like Texas, Arizona, and Florida, midday summer sun can sometimes be too intense. Peppers may experience sunscald on their fruit (white, papery patches) or drop blossoms when temperatures exceed 90°F. In these climates, providing light afternoon shade with a shade cloth or placing pots where they get relief from the harshest rays can actually improve yields.
Indoor or Low-Light Options
If your space gets less than 6 hours of sun, you can supplement with a grow light. LED grow lights work well for pepper seedlings and can extend your growing season indoors. However, for full-size plants producing fruit, natural sunlight is hard to beat.
Watering Pepper Plants in Pots
Watering is where many new container gardeners make mistakes—either too much or too little. Learning how to water pepper plants correctly is one of the most important skills you’ll develop.
How Often to Water
There’s no universal schedule because watering frequency depends on your climate, pot size, soil type, and the weather. As a general rule:
- Seedlings and young plants: Water when the top inch of soil feels dry.
- Mature plants in summer: You may need to water daily, especially in hot climates or small pots.
- Cooler weather: Water every 2 to 3 days, checking soil moisture before each watering.
The Finger Test
The easiest way to check if your pepper plants need water is the finger test. Stick your finger about 2 inches into the soil. If it feels dry, water thoroughly until water runs out of the drainage holes. If it’s still moist, wait another day.
Signs of Water Stress
- Underwatering: Wilting leaves, dry and brittle soil, slow growth, and dropped flowers or fruit.
- Overwatering: Yellowing leaves, mushy stems, a sour smell from the soil, and root rot. Overwatered plants may also wilt—which is confusing because they look like they need more water. Always check the soil before watering a wilted plant.
Watering Tips
- Water in the morning so foliage has time to dry before nightfall, reducing disease risk.
- Water at the base of the plant, not over the leaves, to prevent fungal problems.
- Use room-temperature or lukewarm water. Ice-cold water can shock pepper roots.
- Mulch the top of the soil with straw or shredded bark to retain moisture and regulate soil temperature.
Consistent moisture is key. Peppers that go through cycles of extreme dryness followed by heavy watering are prone to blossom end rot—a condition where the bottom of the fruit turns black and sunken.
How to Fertilize Pepper Plants
Pepper plants are moderate feeders. They need steady nutrition throughout the growing season, but too much fertilizer can actually hurt production.
Understanding Fertilizer Types
Fertilizers are labeled with three numbers (N-P-K), representing nitrogen (N), phosphorus (P), and potassium (K).
- Nitrogen (N): Promotes leafy green growth. Too much nitrogen gives you a big, bushy plant with very few peppers.
- Phosphorus (P): Supports root development and flowering—essential for fruit production.
- Potassium (K): Helps with overall plant health, disease resistance, and fruit quality.
Feeding Schedule for Potted Peppers
At planting: Mix a balanced, slow-release organic fertilizer (like a 5-5-5 or 4-6-3) into the potting mix.
Early growth (first 4–6 weeks): A balanced liquid fertilizer every 2 to 3 weeks supports healthy root and leaf development.
Flowering and fruiting: Once you see flower buds forming, switch to a fertilizer that’s lower in nitrogen and higher in phosphorus and potassium (something like a 3-5-5 or tomato fertilizer). This encourages fruit set rather than leafy growth.
Late season: Reduce fertilizing as temperatures cool in fall. Too much fertilizer late in the season can promote tender new growth that’s vulnerable to cold damage.
Organic vs. Synthetic
- Organic fertilizers (fish emulsion, compost tea, worm castings, bone meal) release nutrients slowly and improve soil health over time.
- Synthetic fertilizers work faster but can burn roots if over-applied and don’t improve soil structure.
For container gardening peppers, organic options tend to work better because they’re gentler and less likely to cause salt buildup in the soil.
Signs of Nutrient Problems
- Yellow leaves overall: Often nitrogen deficiency.
- Purple or reddish leaves: Could indicate phosphorus deficiency.
- Yellow edges on leaves: May signal potassium deficiency.
- Blossom end rot: Usually caused by inconsistent watering affecting calcium uptake, not necessarily a calcium deficiency in the soil.
Planting Peppers in Containers
Whether you’re starting from seed or transplanting seedlings, getting the planting step right sets the tone for the entire growing season.
Growing Peppers from Seed
Starting peppers from seed is rewarding and cost-effective, but it takes patience. Peppers are slow starters.
Step-by-step seed starting:
- Start indoors 8 to 10 weeks before your area’s last expected frost date.
- Use seed-starting mix in cell trays or small pots. Plant seeds about ¼ inch deep.
- Keep warm: Pepper seeds germinate best at 75°F to 85°F. Use a seedling heat mat if your home is cool.
- Provide light: Once seeds sprout (usually in 7 to 21 days), move them under grow lights or to a very sunny south-facing window.
- Thin and transplant: When seedlings have two sets of true leaves, transplant them into larger pots.
- Harden off: About a week before moving plants outside, gradually expose them to outdoor conditions for a few hours each day.
How to Transplant Pepper Seedlings
If you’re buying seedlings from a nursery or transplanting your own, follow these steps:
- Choose healthy seedlings with sturdy stems and deep green leaves. Avoid plants that are already flowering (they may be root-bound or stressed).
- Prep the pot: Fill your container with potting mix, leaving about 2 inches of space from the rim.
- Dig a hole slightly larger than the seedling’s root ball.
- Plant at the same depth the seedling was growing at in its original pot. Unlike tomatoes, peppers don’t benefit from being planted deeper.
- Water thoroughly after planting to settle the soil around the roots.
- Provide support: Insert a small stake or cage early on. As plants grow heavy with fruit, they’ll need something to lean on.
Pro tip: Pinch off any early flowers that appear in the first two weeks after transplanting. This forces the plant to put energy into root and leaf growth rather than fruit production, which results in a stronger, more productive plant in the long run.
Caring for Jalapeños, Habaneros, and Bell Peppers
While the general care for all peppers is similar, each variety has its own quirks. Here are variety-specific tips to help you get the best results.
Jalapeño Care Tips
Jalapeños are relatively low-maintenance and forgiving. They grow quickly, produce abundantly, and tolerate minor care mistakes better than most peppers.
- Spacing in pots: One jalapeño plant per 5-gallon container.
- Harvest window: Start harvesting when peppers are firm, glossy, and about 3 to 5 inches long. You can pick them green or let them ripen to red for sweeter, hotter flavor.
- Productivity tip: The more you harvest, the more the plant produces. Pick regularly to keep your jalapeño plant churning out new peppers.
- Heat factor: Stress (from inconsistent water or extreme heat) can actually make jalapeños spicier. If you prefer milder peppers, keep plants consistently watered and shaded during peak afternoon heat.
Habanero Care Tips
Habaneros need a little more TLC, particularly when it comes to temperature.
- Spacing in pots: One habanero plant per 7- to 10-gallon container. These plants grow larger and need more root space.
- Temperature needs: Habaneros thrive when temperatures stay consistently above 70°F. They struggle in cool, wet conditions. If a cold snap is expected, move pots to a sheltered location.
- Slower to fruit: Habaneros take longer to mature and produce fruit than jalapeños—often 90 to 120 days from transplant. Be patient.
- Handling caution: Always wear gloves when harvesting or handling habaneros. The capsaicin can cause serious burning if it gets on your skin or in your eyes.
- Container advantage: Because habaneros are sensitive to soil-borne diseases and need warm soil, growing them in containers gives you more control over their environment.
Bell Pepper Care Tips
Bell peppers are the divas of the pepper world. They’re slower growing, pickier about conditions, and need more support than their hot pepper cousins.
- Spacing in pots: One bell pepper plant per 7- to 10-gallon container. They have larger root systems.
- Support is essential: Bell peppers produce heavy fruit that can snap branches. Use tomato cages, stakes, or pepper supports to keep plants upright.
- Color change: All bell peppers start green. If you want red, yellow, or orange peppers, leave fruit on the plant longer. Colored peppers are sweeter and more nutritious, but they take 2 to 3 extra weeks to ripen.
- Blossom drop: Bell peppers are prone to dropping flowers when temperatures fluctuate wildly. Keep conditions as consistent as possible.
- Calcium needs: Bell peppers are susceptible to blossom end rot. Maintain consistent watering and consider adding a calcium supplement to your soil if this has been a problem in past seasons.
Common Pepper Growing Problems
Even experienced gardeners run into issues. Here are the most common problems with potted pepper plants and how to fix them.
Pests
- Aphids: Tiny green or black insects that cluster on new growth and the undersides of leaves. Spray them off with a strong stream of water or treat with insecticidal soap or neem oil.
- Spider mites: These tiny pests cause stippling on leaves and fine webbing. They thrive in hot, dry conditions. Increase humidity around plants and treat with neem oil.
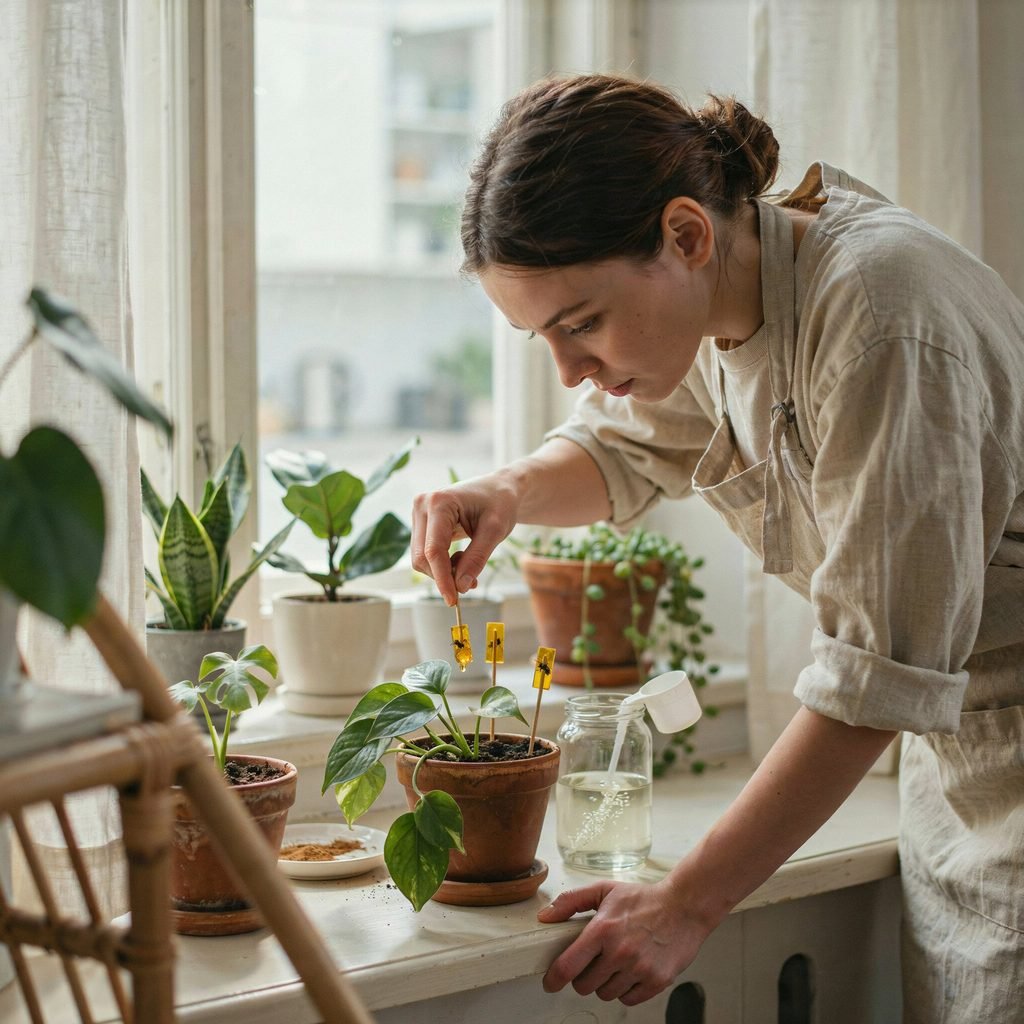
- Whiteflies: Small white flying insects that swarm when you disturb the plant. Use yellow sticky traps and insecticidal soap.
- Pepper weevils: Less common but destructive. They feed on flower buds and fruit. Remove and destroy infested fruit.
Blossom Drop
Blossom drop happens when flowers fall off before setting fruit. Common causes include:
- Temperatures below 60°F or above 90°F
- Inconsistent watering
- Too much nitrogen fertilizer
- Low humidity
- Lack of pollination (peppers are self-pollinating, but gentle shaking of plants can help)
Yellow Leaves
Yellowing leaves can indicate several things:
- Overwatering: Yellow leaves combined with wet soil and wilting.
- Nutrient deficiency: Older leaves yellowing first usually points to nitrogen deficiency. New growth yellowing could indicate iron or magnesium deficiency.
- Natural aging: Older, lower leaves naturally yellow and drop as the plant matures. This is normal.
Sunscald
White, papery, or tan patches on peppers indicate sunscald. It happens when fruit is suddenly exposed to intense, direct sunlight—especially on plants that have lost leaves to pests or disease. Provide partial shade during the hottest part of the day or ensure plants have enough foliage to shade their own fruit.
Slow Growth
If your pepper plants seem stuck, consider these factors:
- Not enough sun (less than 6 hours)
- Cool temperatures (peppers slow down below 65°F)
- Root-bound plants in pots that are too small
- Poor soil or lack of fertilizer
- Overwatering (roots can’t function in soggy soil)
Temperature Stress
Peppers are warm-season crops. They thrive between 70°F and 85°F during the day and 60°F to 70°F at night. In the US, this means peppers perform best from late spring through early fall in most regions. In northern states, growing peppers in containers is especially valuable because you can move pots to warm, sheltered spots and even bring them indoors during cold snaps.
Harvesting Peppers
Knowing when and how to harvest your peppers makes a big difference in flavor, heat, and overall yield.
When to Harvest
- Jalapeños: Harvest when they’re 3 to 5 inches long, firm, and glossy green. They can also be left to ripen to red for a sweeter, hotter pepper. Look for small cracks or “corking” lines on the skin—this is a sign of maturity and often indicates a spicier pepper.
- Habaneros: Wait until they turn bright orange (or red, depending on the variety) and feel slightly soft when gently squeezed. Green habaneros are edible but not as flavorful or as hot.
- Bell peppers: Green bell peppers can be harvested when they reach full size (about 3 to 4 inches across) and are firm. For red, yellow, or orange peppers, leave fruit on the plant until it fully changes color. Colored peppers are sweeter and contain more vitamins.
How to Harvest
Always use clean, sharp scissors or pruning shears to cut peppers from the plant. Don’t pull or twist them off—you risk breaking branches. Cut the stem about ½ inch above the pepper.
Harvest Frequency
The more you pick, the more your plant produces. Regular harvesting signals the plant to keep flowering and setting new fruit. If peppers stay on the plant too long, they draw energy away from new growth and can slow overall production.
Post-Harvest Care
- Fresh eating: Use peppers within 1 to 2 weeks when stored in the refrigerator crisper drawer.
- Preserving: Jalapeños and habaneros can be frozen whole, dried, pickled, or made into hot sauce. Bell peppers freeze well when diced or can be roasted and canned.
- Seeds: Save seeds from open-pollinated (non-hybrid) varieties for next season. Let a pepper fully ripen on the plant, cut it open, remove seeds, and dry them in a cool, well-ventilated area for 1 to 2 weeks.
Final Tips for Bigger Yields
Want to squeeze every last pepper out of your potted plants? These simple strategies will help you maximize production throughout the growing season.
- Pinch early flowers. Remove the first round of flowers after transplanting. This directs energy to root and foliage development, resulting in a stronger plant that produces more peppers later.
- Keep harvesting. Don’t let peppers sit on the plant indefinitely. Regular picking keeps the plant in production mode.
- Top-dress with compost. Midway through the season, add an inch of fresh compost to the top of the soil. This replenishes nutrients that have been used up and improves soil structure.
- Rotate fertilizer types. Alternate between a balanced liquid fertilizer and a bloom-booster formula to give plants a complete range of nutrients.
- Use companion plants. Basil, marigolds, and nasturtiums planted in the same pot or nearby can help deter pests and improve pepper flavor.
- Mulch your pots. A layer of straw, shredded leaves, or bark chips on top of the soil reduces evaporation, keeps roots cool, and prevents soil from splashing onto leaves during watering.
- Protect from extreme weather. Have a plan for unexpected cold snaps (move pots indoors or cover with frost cloth) and extreme heat (provide afternoon shade and water more frequently).
- Keep plants healthy, not huge. Lush, over-fertilized plants with tons of leaves but few peppers are a common mistake. Aim for steady, balanced growth rather than maximum size.
- Try succession planting. If you have space, start a second round of pepper seedlings in mid-summer. Transplant them into fresh pots in late summer for a fall harvest.
- Overwinter favorites. In warmer US zones (8 and above), you can overwinter pepper plants by bringing them indoors before the first frost. Place them in a bright window and reduce watering. They’ll go dormant but can resume growth in spring.
Frequently Asked Questions
Can peppers grow well in pots?
Absolutely. Peppers are one of the best vegetables for container gardening. They adapt well to pots, produce heavily, and actually benefit from the warm soil that containers provide. Many experienced gardeners prefer growing peppers in containers over planting them in the ground because they have more control over soil quality, drainage, and placement.
How big should a pot be for pepper plants?
At minimum, use a 5-gallon container (about 12 inches wide and deep) for most pepper varieties. Larger varieties like bell peppers and habaneros do better in 7- to 10-gallon containers. Bigger pots hold more soil, which means more consistent moisture and nutrients, leading to healthier plants and bigger harvests.
Do peppers need full sun?
Yes. Peppers need at least 6 to 8 hours of direct sunlight every day to produce well. More sun leads to more flowers, more fruit, and better flavor. If your space doesn’t get enough natural light, consider supplementing with grow lights or choosing a different crop.
How long do pepper plants take to produce fruit?
From transplant, most peppers take 60 to 90 days to produce harvestable fruit. Jalapeños are on the faster end (65 to 80 days), while habaneros and bell peppers take longer (80 to 120 days). If you’re growing peppers from seed, add another 8 to 10 weeks for seedling development before transplanting.
Can I grow jalapeños, habaneros, and bell peppers together?
Yes, you can grow different pepper varieties near each other. They have similar care requirements and won’t cross-pollinate in a way that affects the current season’s fruit. However, if you’re saving seeds, cross-pollination between varieties can result in hybrid seeds that produce unexpected peppers the following year. Give each plant its own pot to prevent root competition and make care easier.
Growing peppers in pots is one of the most rewarding projects any US home gardener can take on. Whether you have a sprawling backyard or a tiny apartment balcony, you can grow your own jalapeños, habaneros, and bell peppers with the right pot, the right soil, plenty of sun, and consistent care.
Start with healthy plants, give them room to grow, keep the soil consistently moist but not soggy, and harvest regularly. Before long, you’ll be picking fresh peppers all summer long—and wondering why you didn’t start sooner.
Happy growing!