For many US home gardeners and self-sufficient homesteaders, there is nothing quite as satisfying as pulling a robust, homegrown onion from the earth. Beyond the superior flavor that comes from freshly harvested produce, growing your own alliums is a fantastic way to reduce your grocery bills and increase your household’s food security. Whether you are growing pungent yellow onions for hearty winter soups or mild red onions for summer salads, the journey from seed to harvest requires patience, observation, and care. However, the work doesn’t end the moment the bulb emerges from the soil. Knowing exactly when to harvest onions and how to handle them post-harvest is the secret to enjoying your garden’s bounty for months to come.
Harvesting onions at the right time is critical for their flavor, texture, and overall storage life. If you pull your onions from the ground too early, the bulbs will not have developed the thick, protective outer layers necessary for long-term storage, meaning they will likely rot or shrivel within a few weeks. On the flip side, leaving onions in the ground for too long after they have matured can make them vulnerable to soil-borne diseases, pests, and rot, especially if late summer rains hit your region.
If your goal is harvesting onions for storage rather than immediate culinary use, timing and technique are everything. This comprehensive guide will walk you through the entire process. We will cover how to identify the exact onion harvest time, the safest way to lift your bulbs without causing damage, the essential onion curing process, and the best practices for storing homegrown onions in a cool dark dry storage environment. By following these research-based, actionable steps, you can avoid common pitfalls and enjoy crisp, flavorful, cured onions straight from your pantry all winter long.
How to Tell Onions Are Ready to Harvest
One of the most common questions among beginner gardeners is how to tell when onions are ready to be pulled. Unlike tomatoes that change color or peppers that reach a specific size, onions give off a very distinct set of visual cues when they have reached full maturity.
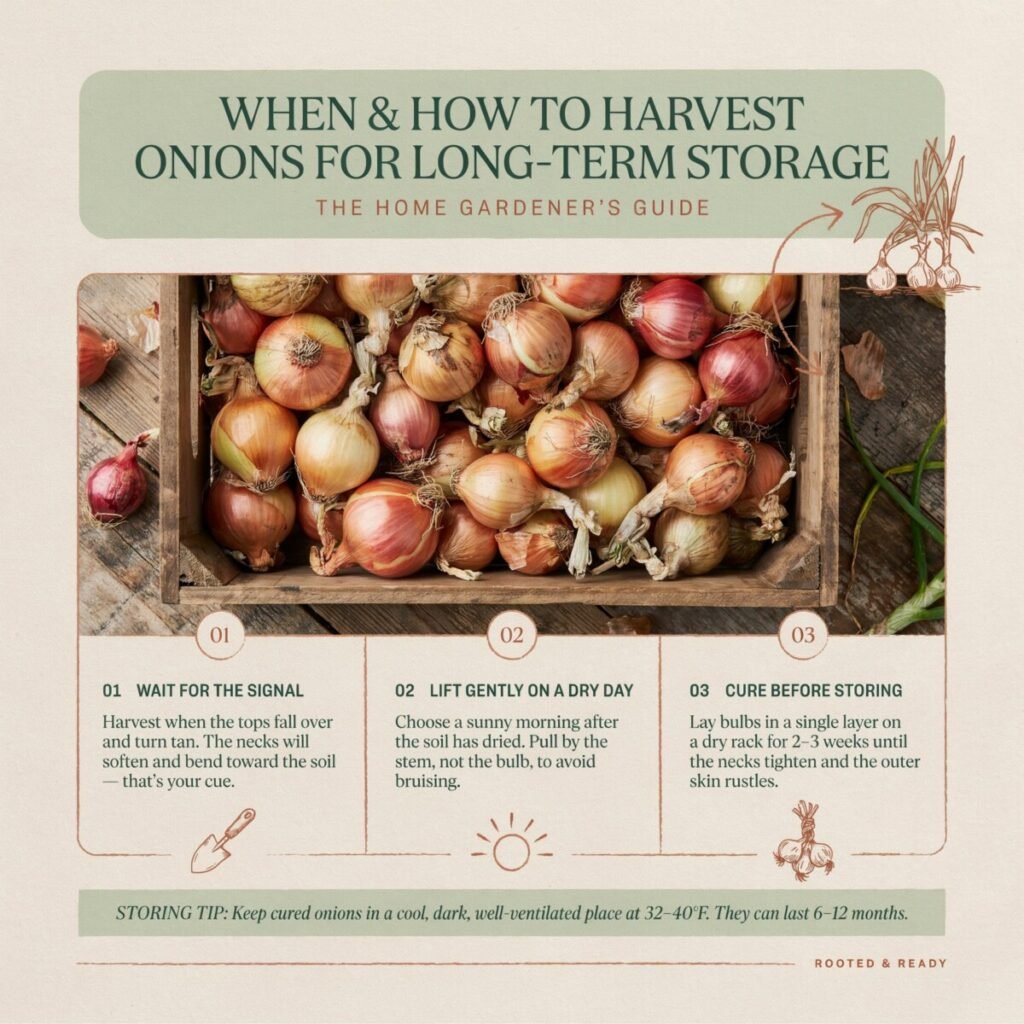
The most reliable indicator that your onions ready to harvest is the behavior of their foliage. As the bulb reaches its maximum size and matures, the plant naturally stops producing new leaves and begins to senesce. You will notice the onion tops falling over at the neck . This flopping or bending over is not a sign of disease or lack of water; it is a biological signal that the onion is preparing for dormancy. While some gardeners are tempted to manually bend the tops over to speed up the process, experts generally advise against this, as it can damage the neck and invite pathogens into the bulb.
It is worth noting that these visual cues apply specifically to bulb onions destined for the pantry. If you are growing green onions (scallions) for immediate use in the kitchen, you can simply harvest them at any time once the green shoots reach about 6 to 8 inches tall, long before the bulb fully forms or the tops fall over.
In addition to the fallen tops, look for the following visual signs of maturity in bulb onions:
- Neck Softening: The area where the leaves meet the bulb (the neck) will start to soften, weaken, and dry out.
- Papery Skins: The outermost layer of the bulb will begin to dry out and take on a papery, translucent texture.
- Firmness: The bulbs should look full, rounded, and feel firm when gently squeezed in the soil.
A good rule of thumb for when to harvest onions is to wait until roughly 50% to 80% of the crop has its tops naturally fallen over.
It is important to remember that the exact calendar date for onion harvest time varies widely depending on the variety you planted, your specific planting date, and your local climate across the US. Generally, bulb onions are ready for harvest about two-and-a-half to four months after planting . However, visible plant signals will always matter more than the calendar alone. Always let the plant tell you when it is done growing.
Best Time of Day and Weather Conditions to Harvest
Once you have determined that your onions are mature, the next step is choosing the right day to pull them. The weather conditions on harvest day play a surprisingly large role in how well your onions will cure and store.
The best time to harvest is on a warm, dry day, preferably in the morning before the peak afternoon heat builds up. Harvesting in the morning allows the onions to begin drying out in the ambient air during the day, which jumpstarts the curing process.
You must avoid harvesting onions when the soil is wet or muddy. Wet conditions drastically increase the chance of storage problems, as moisture clinging to the bulbs and roots creates a breeding ground for fungal diseases and bacterial soft rot. If your region has just experienced a heavy summer downpour, wait for a stretch of dry weather so the soil can dry out and the bulbs can begin drying naturally after being lifted. If you are forced to harvest during a wet spell due to an impending hard frost, you will need to take extra precautions during the curing phase to ensure the bulbs dry completely.
How to Harvest Onions Without Damaging Them
Knowing how to harvest onions properly is just as important as knowing when to do it. The goal during harvest is to extract the bulbs from the earth with zero damage to the protective outer skins or the neck. Even a tiny scrape or bruise can become an entry point for rot-causing bacteria, ruining an otherwise perfect bulb during long-term onion storage.
Follow these step-by-step instructions to harvest your onions safely:
- Loosen the Soil: Do not just grab the green tops and yank. Instead, use a garden fork or a spade to gently loosen the soil a few inches away from the bulb. Insert the tool deep into the ground and lever it back slightly to lift the soil and the onion together. If you garden in heavy clay soil, which tends to compact tightly around the bulb, using a garden fork is absolutely essential. Trying to pull an onion by its tops in heavy clay will almost certainly result in the neck snapping off, leaving the bulb trapped in the earth.
- Lift Carefully: Once the soil is loosened, gently lift the bulbs out by hand or carefully pull them by the base of the neck.
- Keep Tops Attached: Never twist or cut the green tops off at this stage. The tops are essential for the onion curing process, as the plant draws the remaining moisture and nutrients from the leaves down into the bulb as it dries.
- Handle with Care: Treat your onions like eggs. Avoid tossing them into buckets or dropping them on hard surfaces. Bruising, cutting, or scraping the bulbs will severely compromise their shelf life.
- Shake, Don’t Wash: Gently shake off any loose clods of dirt. Do not wash your harvested onions. Water is the enemy of storage. If the soil is heavy clay and stubbornly clings to the roots, simply leave it; it will brush off easily once the onion is fully cured and dry.
Keep in mind that any onion with a split bulb, a deep wound, or signs of disease should be separated immediately. These damaged bulbs will not survive the onion curing process intact and should be used in the kitchen first rather than placed into storage.
The Onion Curing Process
If you want to store onions long term, the onion curing process is absolutely non-negotiable. Curing is the process of slowly drying the outer layers of the onion and the neck to create a tight, protective seal around the bulb. Without this step, the high moisture content inside the freshly harvested onion will quickly lead to mold, sprouting, and rot.
How to cure onions properly requires a specific environment. You need a warm, dry, well-ventilated area out of direct sunlight and rain. Ideal locations include a well-ventilated garage, a dry shed, a covered porch, or even a spare room with fans circulating the air.
While a brief period of gentle sun drying immediately after harvest can help dry off wet soil, you should avoid leaving your onions in direct, scorching sunlight for the entire curing period. Intense UV rays and high heat can actually cause sunscald on the outer layers of the bulb, degrading their flavor and damaging the very tissues you are trying to protect. Indirect light, deep shade, or an indoor space with oscillating fans is vastly superior for the long-term onion curing process.
Here is how to execute the curing process:
- Lay Them Out: Spread your harvested onions out in a single layer on a breathable surface. Wire racks, old window screens propped up on sawhorses, or clean tarps work perfectly. Ensure there is plenty of space between each bulb so air can circulate on all sides. Alternatively, you can braid the tops together or tie them in small bundles and hang them from rafters.
- Wait 2 to 3 Weeks: Depending on the humidity, temperature, and the size of your onions, curing typically takes about two to three weeks . In humid climates, it may take slightly longer.
- Monitor the Necks: The most critical part of curing onions after harvest is ensuring the neck is completely dry. The neck is the stem area right above the bulb. It must be completely shriveled, dry, and tight. If the neck still feels thick, damp, or green, the onion is not ready for storage.
- Check the Skins: The outer skins should be entirely papery and rustle when you touch them. The roots at the base of the bulb should also be wiry, brittle, and completely dry.
Properly cured onions are the foundation of successful long-term onion storage. Rushing this step is the number one reason home gardeners lose their winter onion crops to rot.
How to Prepare Onions for Storage
Once your onions have spent a few weeks curing and the necks are papery and tight, it is time to prepare them for their final resting place. However, you must be careful not to trim them prematurely.
Only fully dried onions should be trimmed. Using a clean, sharp pair of pruning shears, trim the dried roots right at the base of the bulb. Next, trim the dried tops down to about one inch above the bulb. Leaving a small tail helps maintain the seal at the top of the onion and prevents moisture from entering the bulb’s core. If you prefer, you can leave the tops long and braid them together for a beautiful, rustic kitchen display that also promotes excellent airflow.
Before moving the onions to their permanent storage location, you must sort through the entire harvest. This is a crucial step in avoiding onion rot. Carefully inspect every single bulb. Separate any onions that feel soft, have visible bruises, show signs of mold, or have unusually thick necks that failed to dry down completely. These “cull” onions will spoil quickly and release gases that can cause neighboring healthy onions to sprout or rot. Set the imperfect onions aside in a separate basket in your kitchen and use them up first. Only the rock-hard, perfectly cured onions with tight, papery skins should be packed away for the winter.
Best Ways to Store Onions Long Term
Now that your onions are cured and sorted, you need to know the best way to store onions to maximize their shelf life. The golden rule of storing homegrown onions is airflow. Onions continue to respire (breathe) after they are harvested, and they release small amounts of moisture and gases. If this moisture is trapped, rot will quickly follow.
Onion storage tips dictate that you should use breathable containers. Mesh bags for onions are widely considered the gold standard because they allow 360-degree air circulation. Wicker baskets, wooden crates, slatted plastic bins, or even clean nylon pantyhose (with a knot tied between each onion) are also excellent choices.
If you do not have commercial mesh bags for onions, a classic homesteading trick is to use clean nylon pantyhose. Drop an onion into the toe, tie a simple knot, drop in the next onion, and tie another knot. Hang the entire tube in your root cellar or basement. This method guarantees that no two onions are touching, providing maximum airflow and ensuring that if one bulb happens to spoil, it won’t directly infect its neighbor.
Never store your onions in plastic bags or sealed airtight containers. Plastic traps ethylene gas and moisture, turning your crisp bulbs into a mushy, moldy mess in a matter of days.
The ideal environment for cool dark dry storage is a space that maintains a consistent temperature between 35°F and 40°F (such as an unheated basement, root cellar, or insulated garage), with low humidity (around 65-70%). The area must be completely dark, as any exposure to light can trick the onions into thinking it is spring, triggering them to sprout green shoots.
Furthermore, do not store onions near apples, pears, or potatoes. Apples and pears release high levels of ethylene gas as they ripen, which accelerates the aging and sprouting process in onions. Potatoes, on the other hand, release moisture and gases that cause onions to rot rapidly. Keep your alliums isolated to ensure they stay fresh. If you follow these guidelines and check your stash every few weeks to remove any sprouting or softening bulbs, you will master how to keep onions fresh for up to 8 months or more.
Common Mistakes to Avoid
Even experienced gardeners can stumble when it comes to post-harvest handling. To ensure your hard work in the garden pays off, review this checklist of common errors that reduce storage life:
| Common Mistake | Why It’s a Problem | How to Fix It |
|---|---|---|
| Harvesting too early | Bulbs lack protective layers and have high water content, leading to rapid shriveling. | Wait until 50-80% of onion tops falling over before pulling. |
| Leaving bulbs in wet soil | Promotes bacterial soft rot and fungal diseases before they even leave the garden. | Wait for a dry spell of weather before harvesting the crop. |
| Bruising during harvest | Scrapes and cuts create entry points for rot-causing pathogens. | Loosen soil deeply with a fork and lift gently by hand. |
| Skipping the curing process | High internal moisture leads to immediate molding in storage bins. | Always cure in a warm, dry, ventilated area for 2-3 weeks. |
| Storing in plastic bags | Traps moisture and ethylene gas, accelerating decay and sprouting. | Use breathable mesh bags for onions, baskets, or wooden crates. |
| Mixing damaged with healthy | One rotting onion will quickly spoil the entire batch via spores and gases. | Sort thoroughly and eat imperfect bulbs immediately. |
| Cutting tops before fully dry | Opens the neck to moisture and bacterial invasion before the seal forms. | Wait until the neck is completely shriveled, tight, and papery. |
Storage Differences by Onion Type
It is important to understand that not all onions are created equal when it comes to shelf life. Storage life can vary dramatically by variety, and choosing the right type is essential if long-term onion storage is your primary goal.
Generally, onions are divided into two categories: fresh-eating (sweet) onions and storage onions. Sweet onions, such as Vidalia, Walla Walla, or Texas Sweets, have a high water and sugar content but low sulfur content. While they are incredibly delicious raw in salads and sandwiches, their high moisture content means they will only keep for a few weeks to a couple of months, even under perfect conditions.
On the other hand, pungent storage onions—typically the yellow, white, or red varieties with tight, thick, papery skins and high sulfur content (like Copra, Patterson, or Red Wing)—are biologically engineered to survive the winter. These are the varieties you should plant if you want to store onions long term. Pungent storage onions can easily last 6 to 10 months in a root cellar.
When planning your garden layout for next year, dedicate a specific bed to high-sulfur storage varieties if your goal is winter food preservation. You can always plant a smaller, separate row of sweet onions to enjoy fresh during the late summer and early autumn months. Always check your seed packets before planting to ensure you are growing a variety suited for the long haul.
Conclusion
Successfully harvesting and storing your own onions is one of the most rewarding aspects of maintaining a home garden or homestead. The secret to a long-lasting harvest lies in paying close attention to the plant’s natural signals and resisting the urge to rush the process. Remember to harvest only when the onion tops falling over indicate true maturity, lift the bulbs gently to avoid bruising, and never skip the vital onion curing process.
By sorting out damaged bulbs and keeping your perfectly cured onions in breathable containers in a cool dark dry storage space, you can enjoy the robust flavor of your homegrown crop long after the summer garden has gone dormant. Not only does mastering these techniques save you money at the grocery store, but it also significantly reduces food waste and increases your household’s self-sufficiency. Follow these practical, research-backed steps, and your pantry will be proudly stocked with crisp, delicious onions all winter long.