There is something incredibly rewarding about stepping into your backyard, snipping a few fresh herbs, and harvesting ripe, juicy tomatoes that you grew with your own two hands. For many homeowners and aspiring gardeners across the US, the dream of cultivating a thriving vegetable garden often hits a roadblock when dealing with poor native soil, heavy clay, or relentless weeds. Enter the ultimate backyard solution: the raised garden bed.
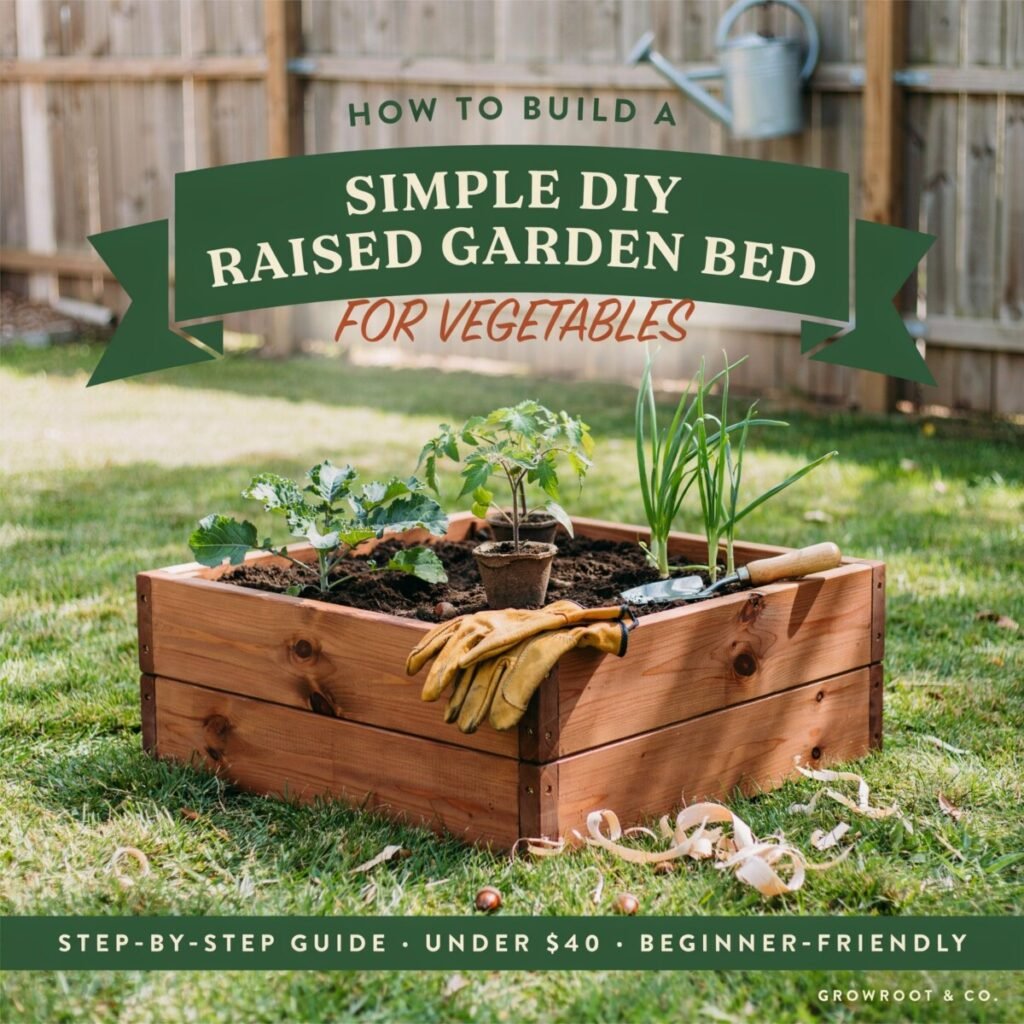
A raised garden bed is essentially a contained, elevated box that sits above the native ground, filled with a nutrient-rich soil blend. It is a game-changer for backyard gardening, offering a myriad of benefits that make growing vegetables easier and more successful. Elevated beds provide superior garden drainage, warm up much faster in the spring to extend your growing season, and drastically reduce the number of weeds you have to pull. Furthermore, they offer easier access, saving your back and knees from the strain of bending over traditional in-ground rows.
If you are a beginner gardener looking for an affordable, simple, and highly effective DIY garden project, you are in the right place. In this comprehensive guide, we will walk you through everything you need to know to build, fill, and plant your very own DIY raised garden bed. Let’s dig in!
Why Build a Raised Garden Bed?
Before we grab our tools, it is important to understand why raised bed gardening has become one of the most popular methods for organic gardening and home food production. When you build a DIY garden bed, you are essentially taking complete control of your growing environment.
Unlike traditional in-ground rows where you are at the mercy of your local soil composition, a raised bed allows you to dictate the exact texture, pH, and nutrient profile of your garden soil. This container-style growing method is particularly advantageous if your native yard consists of heavy, compacted clay or rocky terrain that makes root penetration nearly impossible.
Additionally, raised beds maximize your outdoor garden space. Because the soil in a raised bed is loose and fluffy, you can practice intensive planting methods, fitting more crops into a smaller footprint without sacrificing plant health. The elevated borders also create a physical barrier against many crawling pests and encroaching lawn grasses, giving your delicate seedlings a fighting chance. Whether you have a sprawling suburban backyard or a modest urban patio, a raised garden bed transforms any patch of sunlight into a highly productive vegetable garden.
Materials and Tools You Need
Building a wooden garden bed is a fantastic weekend project that requires only basic garden tools and easily sourced gardening supplies. You do not need to be a master carpenter to construct a sturdy, beautiful bed. Here is a comprehensive list of what you will need.
The Lumber
The most critical decision you will make is choosing the right wood. For a long-lasting, naturally rot-resistant option, a cedar raised bed is the gold standard. Cedar and redwood contain natural oils that repel insects and resist decay, often lasting 10 to 15 years or more. If you are on a strict budget, untreated pine or spruce is an affordable alternative, though it will likely need replacing after 3 to 5 years. Avoid using old railroad ties or pressure-treated wood manufactured before 2004, as they may contain harmful chemicals like arsenic or creosote that can leach into your vegetable garden.
- Boards: (4) 2-inch by 6-inch (or 2×8) boards, cut to your desired length (e.g., two 8-foot boards and two 4-foot boards for a standard 4×8 bed).
- Corner Posts: (4) 4×4 wooden posts, cut to the height of your bed (optional but highly recommended for structural stability).
Hardware and Fasteners
- Exterior Wood Screws: 3-inch or 3.5-inch galvanized or coated exterior screws. Do not use drywall screws, as they will rust and snap.
- Hardware Cloth: A roll of galvanized steel wire mesh (1/2-inch or 1/4-inch grid) to place at the bottom of the bed to keep out gophers and moles.
- Landscape Fabric: Optional, but useful if you are placing the bed over a weedy area or want to separate the native soil from your new soil mix.
Essential Tools
- Power drill and drill bits
- Measuring tape and a pencil
- Speed square (for ensuring perfect 90-degree corners)
- Level
- Hand saw or circular saw (if the lumber yard doesn’t cut it for you)
- Shovel and a heavy-duty garden rake
- Work gloves and safety glasses
Note: If cutting and assembling lumber sounds intimidating, many local hardware stores sell a pre-cut raised bed kit that includes corner brackets and pre-measured boards, allowing you to assemble the garden bed frame like a puzzle.
Choose the Best Location
Selecting the right spot for your garden layout is just as important as the construction itself. Once filled with soil, a raised bed is incredibly heavy and nearly impossible to move, so choose wisely!
Sunlight is Everything
Most edible crops, especially fruiting plants like tomatoes and peppers, require a minimum of 6 to 8 hours of full sun per day. Spend a Saturday observing your yard. Note where the sun hits in the morning and where the shadows fall in the late afternoon. Avoid placing your bed near large trees or the south side of tall structures that will cast long shadows over your plants.
Consider Garden Drainage and Topography
While raised beds inherently improve drainage, you still want to place your bed on relatively level ground. If you place your garden bed frame on a steep slope, water will pool at the lower end, drowning the roots on one side while leaving the other side parched. If your yard is sloped, you may need to do a little terraforming or build a retaining wall on the lower side to ensure the bed sits flat. Excellent garden drainage ensures that excess water flows away from the root zone, preventing root rot and fungal diseases.
Accessibility and Water Source
Think about the logistics of your daily garden maintenance. You will be watering, weeding, and harvesting frequently, so place your garden site close to a reliable water source. Hauling heavy watering cans across a sprawling lawn gets old very quickly. Furthermore, ensure there is at least a 2-foot walking path around all sides of the bed so you can easily access the center for vegetable planting and harvesting without stepping into the bed and compacting your precious soil.
Step-by-Step Instructions
Ready to build? Here are your comprehensive DIY raised bed instructions for raised bed construction.
Step 1: Measure and Mark the Dimensions
Determine the size of your bed. For this guide, we will assume a standard 4-foot by 8-foot rectangle. Measure and mark your lumber accordingly. If your local home improvement store offers free or low-cost cutting services, have them cut your boards to size before you bring them home.
Step 2: Prepare the Ground
Clear the selected area of tall grass, large rocks, and debris. If you are dealing with aggressive weeds or Bermuda grass, lay down a layer of heavy-duty cardboard over the grass before building. The cardboard will smother the weeds and eventually decompose, adding organic matter to the soil below.
Step 3: Assemble the Frame
Lay your long boards and short boards on a flat surface (like a driveway or patio) to form a rectangle. Place your 4×4 corner posts inside the corners. Using your speed square to ensure the corners are perfectly at 90-degree angles, drill pilot holes through the long boards into the corner posts, and then drive your 3-inch exterior screws in. Repeat this for all four corners.
Pro Tip: Pre-drilling your pilot holes prevents the wood from splitting, especially near the ends of the boards.
Step 4: Secure the Corners and Add Stability
For a wooden garden bed that is taller than 10 inches, it is wise to add a second row of boards stacked on top of the first. Simply stagger the seams (so the top board’s seam doesn’t align with the bottom board’s seam) and screw the top boards into the corner posts and into the boards below them. This creates a massively sturdy garden bed frame capable of holding hundreds of pounds of wet soil.
Step 5: Place and Level the Bed
Move your assembled frame to your prepared garden site. Place your carpenter’s level on all sides and across the diagonals. If the bed is uneven, use a shovel to scrape away soil from the high side or add packed dirt under the low side until the frame sits perfectly level.
Step 6: Add Bottom Protection
If gophers or moles are a problem in your area, staple a piece of galvanized hardware cloth to the bottom inside edges of the frame, letting it rest on the ground. This is a crucial step in how to build a raised garden bed in the western and southern US where burrowing pests are common. If weeds are your only concern, you can lay down permeable landscape fabric instead.
Step 7: Fill with Soil and Compost
Now comes the heavy lifting! Fill your newly constructed cedar raised bed (or pine bed) with your chosen soil mix. Mound the soil slightly above the rim, as it will settle significantly after the first few deep waterings. Water the empty soil thoroughly to help it settle before you begin planting.
Best Size and Height for Vegetables
When planning your raised vegetable bed, dimensions matter for both plant health and human ergonomics.
The Golden Rule of Width
The most important rule of garden bed size is that you should never have to step inside the bed to tend to your plants. Stepping on the soil compacts it, destroying the aeration and soil drainage you worked so hard to achieve. Therefore, the maximum width of your bed should be 4 feet (assuming you have access to both sides). This allows the average adult to comfortably reach 2 feet into the center of the bed from either side. If your bed is placed against a fence or wall where you only have access to one side, limit the width to 2 or 3 feet.
Length and Plant Spacing
Length is entirely up to your available space and lumber dimensions. A 4×8 bed is standard because it utilizes standard 8-foot lumber without requiring any cuts, minimizing waste. However, 4×4 beds are excellent for smaller spaces or dedicated herb gardens. When planning your plant spacing, a 4×8 bed offers 32 square feet of growing area, which is plenty of room for a diverse, high-yield harvest.
Determining Bed Depth
The ideal bed depth depends on what you intend to grow. A standard depth of 11 inches (the height of two 2×6 boards) is perfectly adequate for most leafy greens, herbs, and shallow-rooted crops like radishes and bush beans. However, if you plan on growing vegetables with deep taproots—such as full-sized carrots, parsnips, or large heirloom tomatoes—or if you want a bed that is easier to reach without bending, aim for a depth of 18 to 24 inches. Deeper beds hold more moisture and provide a larger reservoir of nutrients, though they do require significantly more soil to fill.
What to Plant in a Raised Bed
One of the greatest joys of vegetable gardening is choosing what to grow. Raised beds warm up faster in the spring, allowing you to start vegetable planting earlier than traditional gardeners.
For beginners, it is best to start with reliable, high-yield crops that offer a quick return on your investment. Leafy greens like lettuce, spinach, and Swiss chard thrive in the loose soil and can be harvested continuously using the “cut-and-come-again” method. Root vegetables like carrots and radishes grow perfectly straight and deep in the uncompacted earth. Bush beans and peas are excellent nitrogen-fixers that keep the soil healthy, while cherry tomatoes and sweet peppers love the heat retention of a raised bed.
A Beginner-Friendly 4×8 Raised Bed Plan
To help you visualize your first season, here is a simple, highly effective layout for a 4×8 wooden bed filled with compost-rich soil:
- The Back Row (North side): Plant 3 to 4 indeterminate tomato vines, supported by tall trellises or heavy-duty cages. Because they are on the north side, they won’t cast shade on the rest of the bed. Tuck a few basil plants at the base of the tomatoes—a classic example of companion planting that is said to improve tomato flavor and repel hornworms.
- The Middle Section: Dedicate this space to root crops. Sow rows of carrots, radishes, and beets. Because the soil is loose, you will pull up beautifully straight, unblemished roots.
- The Front Edges (South side): Plant leafy greens like loose-leaf lettuce, spinach, and aromatic herbs like cilantro and parsley. These lower-growing plants will catch all the southern sun without being shaded out by the towering tomatoes in the back.
This simple layout maximizes space, utilizes vertical growing, and provides a continuous harvest of homegrown vegetables from early summer right up to the first frost.
Soil Mix and Fertilizer Tips
The secret to a bountiful harvest lies beneath the surface. Never fill your raised bed with native dirt dug up from your yard; it is too heavy, compacts easily, and restricts root growth. Instead, you need a specialized raised bed soil mix that is light, fluffy, and rich in nutrients.
The Perfect Soil Recipe
A widely accepted and highly successful recipe for compost for raised beds and soil blends is the “60-30-10” rule:
- 60% High-Quality Topsoil: This provides the bulk and structural base for your bed. Look for a screened topsoil that is free of large rocks and debris.
- 30% Organic Compost: This is the engine of your soil. Compost provides a massive dose of macro and micronutrients, introduces beneficial soil microbes, and helps the soil retain moisture. You can use homemade compost, mushroom compost, or composted cow manure.
- 10% Aeration and Drainage Material: Add coarse vermiculite, perlite, or pumice. This ensures the soil remains loose and prevents it from compacting over time, guaranteeing excellent soil drainage.
Mix these ingredients thoroughly in a wheelbarrow or directly in the bed using a garden fork.
Fertilizing and Mulching
Even the best soil will eventually deplete its nutrients as your heavy-feeding crops grow. To maintain an edible garden that produces year after year, practice organic gardening techniques by top-dressing your bed with an inch of fresh compost every spring. During the growing season, use a balanced organic fertilizer (like fish emulsion or kelp meal) every few weeks to give your plants a boost.
Finally, do not forget garden mulch. Once your plants are established, apply a 2-inch layer of organic mulch—such as straw, shredded leaves, or untreated grass clippings—around the base of your plants. Mulch suppresses weeds, regulates soil temperature, and drastically reduces water evaporation, keeping your plants happy during the dog days of summer.
Maintenance and Care
While raised beds are famously low-maintenance compared to traditional tilled gardens, they still require regular vegetable garden care to thrive.
Watering: Because raised beds drain exceptionally well, they also dry out faster than in-ground gardens. During the heat of summer, you may need to water your bed deeply every day or every other day. Always water at the base of the plants rather than overhead to keep the foliage dry and prevent fungal diseases like powdery mildew. Consider installing a simple drip irrigation system or soaker hose on a timer—it is a massive time-saver and ensures consistent moisture levels.
Weeding: Thanks to your landscape fabric or cardboard base, weeds should be minimal. However, wind-blown seeds will inevitably find their way into your fluffy soil. Spend 10 minutes a week pulling any small weeds before they have a chance to establish deep roots or go to seed.
Pest Control: Keep an eye out for common garden invaders like aphids, caterpillars, and slugs. Because you are managing a smaller, contained space, pest control is much easier. Hand-pick larger pests like tomato hornworms, and use organic sprays like Neem oil or insecticidal soap for smaller infestations. Floating row covers are also an excellent, chemical-free way to protect your brassicas (like broccoli and kale) from cabbage moths. By staying vigilant, you will ensure healthy plants and a bountiful harvest.
Common Mistakes to Avoid
Even the most enthusiastic beginner can stumble. Here are a few common pitfalls to avoid when starting your backyard gardening journey:
- Choosing the Wrong Location: Placing your bed in a shady area or too far from a water spigot will lead to stunted plants and eventual frustration. Always prioritize full sun and convenience.
- Using Untreated Wood That Rots Quickly: While budget-friendly, cheap pine will rot in just a few years if it is in constant contact with wet soil. If you cannot afford cedar, consider lining the inside of a pine bed with heavy-duty plastic (ensure it is food-safe) to prolong its life, or opt for composite lumber.
- Overcrowding Plants: It is tempting to squeeze as many seedlings as possible into your new bed. However, ignoring proper plant spacing leads to poor air circulation, increased disease risk, and competition for nutrients. Follow the spacing guidelines on your seed packets.
- Skipping the Bottom Barrier: Failing to lay down hardware cloth or cardboard before filling the bed can result in a hostile takeover by aggressive weeds or burrowing rodents halfway through the summer.
- Using Low-Quality Soil: Do not skimp on the dirt. Filling your expensive wooden garden bed with cheap, sandy “fill dirt” will result in poor yields. Invest in high-quality topsoil and rich compost from the start.
Conclusion
Building a simple DIY raised garden bed is one of the most rewarding home improvement projects you can undertake. Not only does it instantly elevate the aesthetic of your garden layout, but it also provides a highly controlled, accessible, and productive environment for growing vegetables. From the superior garden drainage to the ease of garden maintenance, raised beds remove the most frustrating barriers to entry for beginner gardeners.
By following these step-by-step instructions, selecting the right materials like a beautiful cedar raised bed, and filling your frame with a nutrient-dense raised bed soil mix, you are setting yourself up for a season of abundant harvests. There is truly nothing quite like the taste of homegrown vegetables cultivated in your own backyard. So grab your garden tools, head to the lumber yard, and start building your very own vegetable garden today. Your future self—and your taste buds—will thank you!