A Complete Guide to Fixing and Preventing Tomato Fruit Rot Without Chemicals
There’s nothing quite like the anticipation of harvesting your first homegrown tomatoes of the season. You’ve watered them, staked them, watched them grow tall and leafy, and finally, those beautiful green fruits start to form. But then you flip one over and see it—a dark, sunken, leathery spot right on the bottom of the fruit. Your heart sinks. Your beautiful tomato is ruined.
If this scenario sounds painfully familiar, you’re not alone. Blossom end rot is one of the most common and frustrating tomato plant problems that home gardeners across the United States face every growing season. Whether you’re tending a backyard garden in Texas, growing containers on a New York balcony, or managing raised bed gardening projects in the Pacific Northwest, this issue can strike anywhere.
The good news? You don’t need harsh chemicals or synthetic treatments to fight back. In this comprehensive guide, you’ll learn how to stop blossom end rot naturally using practical, proven methods that work in real American gardens. From understanding the root cause to implementing long-term prevention strategies, we’ll cover everything you need to grow healthy, bountiful tomato harvests using organic tomato care principles.
Let’s dig in.
What Is Blossom End Rot?
Before you can fix the problem, it helps to understand exactly what you’re dealing with.
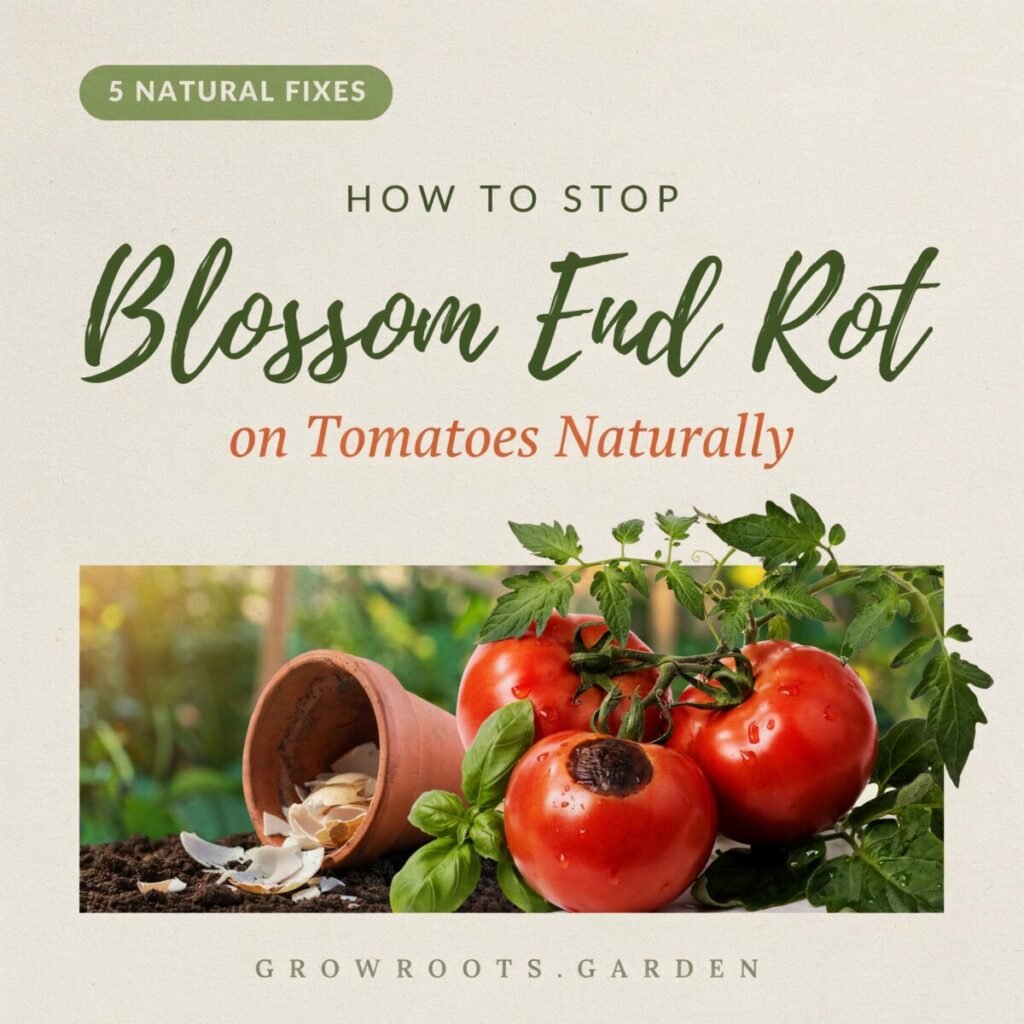
Blossom end rot on tomatoes appears as a water-soaked, dark spot on the bottom (the blossom end) of the fruit—the end opposite from where the stem attaches. Over time, this spot enlarges, turning brown or black, and becomes sunken and leathery to the touch. In severe cases, the entire bottom half of the tomato can become affected, leaving it useless and susceptible to secondary infections from fungi or bacteria.
Here’s the critical thing to understand: blossom end rot is not a disease. It’s not caused by a fungus, bacteria, virus, or pest. It is a physiological disorder—meaning it’s related to how the plant functions internally, not an external attack.
This distinction matters enormously because it changes how you approach treatment. You don’t need fungicides. You don’t need pesticides. You need to address the underlying growing conditions that are preventing your tomato plant from developing fruit properly.
The disorder most commonly affects tomatoes, but it can also appear on peppers, eggplants, and squash. It typically shows up on the earliest fruits of the season, and sometimes disappears as plants mature and growing conditions stabilize.
Why Blossom End Rot Happens
Understanding the causes is the key to effective tomato blossom end rot treatment. While many people immediately think of calcium deficiency in tomatoes as the sole culprit, the reality is more nuanced. Let’s break down the primary causes.
Calcium Uptake Issues
Calcium is essential for building strong cell walls in developing tomato fruit. When a plant can’t deliver enough calcium to its fruits, the cells at the blossom end collapse, creating that characteristic dark, sunken area. However—and this is important—the soil may actually contain plenty of calcium. The problem is often that the plant cannot absorb or transport it to the fruit efficiently.
Calcium moves through the plant via water uptake through the roots. When water flow is disrupted for any reason, calcium delivery gets disrupted too. Leaves “win” the competition for available calcium over fruits because they transpire (release water vapor) more actively. This is why you can have a nutrient imbalance in tomatoes even when your soil tests show adequate calcium levels.
Irregular Watering
Watering tomatoes properly is arguably the single most important factor in preventing this disorder. Tomatoes need consistent moisture, especially during fruit development. When the soil goes through cycles of being too dry and then too wet, the plant’s ability to take up calcium becomes erratic.
A common scenario: a week of hot, dry weather dries out the soil. The plant struggles. Then a heavy rain or deep watering hits, and the fruit suddenly expands rapidly—but without sufficient calcium to support that growth. The result is blossom end rot.
Heat Stress
Tomatoes love warmth, but extreme heat—particularly prolonged temperatures above 90°F (32°C)—can stress plants and disrupt normal physiological processes. When combined with inconsistent moisture, heat stress becomes a major trigger for tomato fruit rot issues.
Root Damage
The root system is your plant’s lifeline for water and nutrients. Any damage to roots—whether from aggressive cultivation, transplanting shock, or compacted soil—reduces the plant’s ability to absorb calcium and water. This is why careful handling during planting and avoiding deep hoeing around established plants matters.
Poor Soil Conditions
Garden soil health plays a massive role in everything your tomatoes do. Heavy clay soils that drain poorly, sandy soils that drain too quickly, and compacted soils that restrict root growth all create conditions that promote blossom end rot. The soil pH for tomatoes also matters—tomatoes prefer a slightly acidic to neutral pH between 6.2 and 6.8. If your soil is too acidic or too alkaline, certain nutrients (including calcium) become “locked up” and unavailable to the plant.
Nutrient Imbalance
Too much nitrogen—especially from quick-release synthetic fertilizers—can actually worsen blossom end rot. Excessive nitrogen promotes rapid leafy growth at the expense of fruit development, and it can interfere with calcium uptake. A balanced approach to feeding is always better than a heavy-handed one.
How to Stop Blossom End Rot Naturally
Now for the practical part. Here are proven, natural remedies for tomato plants that address blossom end rot without resorting to chemical treatments.
Water Deeply and Consistently
Consistent watering is your number one weapon against blossom end rot. Tomatoes need about 1 to 1.5 inches of water per week, including rainfall. During hot, dry periods, you may need to water more frequently.
The key is consistency. Water on a regular schedule rather than waiting until plants look wilted. Deep, infrequent watering is better than shallow daily sprinkling because it encourages roots to grow deeper, making plants more resilient.
Use a rain gauge or a simple tuna can placed in the garden to measure how much water your plants are actually receiving. This removes the guesswork and helps you maintain the steady moisture levels your tomatoes need.
Apply Mulch Generously
Mulch for tomatoes is one of the easiest and most effective ways to maintain consistent soil moisture. A 2- to 4-inch layer of organic mulch—such as straw, shredded leaves, grass clippings (from untreated lawns), or wood chips—acts as a buffer between the soil and the elements.
Mulch slows evaporation, keeps soil temperatures more stable, prevents soil splashing onto leaves (which can spread actual diseases), and gradually breaks down to improve soil structure. Apply mulch after the soil has warmed in spring, keeping it a few inches away from the plant stem to prevent rot.
Improve Soil with Compost
Adding well-aged compost to your garden beds is one of the best things you can do for long-term organic tomato care. Compost improves soil structure, increases water retention in sandy soils, improves drainage in clay soils, and provides a slow release of nutrients including calcium.
Work 2 to 4 inches of compost into your planting beds before setting out transplants. You can also side-dress established plants with compost mid-season to give them a gentle nutrient boost.
Test Your Soil Before Planting
Don’t guess about your soil—test it. A basic soil test will tell you your pH level and nutrient profile. Most county extension offices in the US offer affordable soil testing services, and home test kits are widely available at garden centers.
If your soil pH is off, you can adjust it naturally. Adding garden lime raises pH (makes soil less acidic), while elemental sulfur or peat moss can lower pH (makes soil more acidic). Make these adjustments well before planting season for best results.
If your soil test reveals genuinely low calcium levels, you can add gypsum (calcium sulfate) to the soil. Gypsum provides calcium without significantly altering soil pH. Apply according to package directions and work it into the soil before planting.
Avoid Over-Fertilizing with Nitrogen
Resist the urge to pump your tomatoes full of high-nitrogen fertilizers. While nitrogen is important for early vegetative growth, too much of it creates problems. Excessive leafy growth shades developing fruit, creates humidity that encourages disease, and disrupts the plant’s ability to uptake calcium.
Choose balanced, slow-release organic fertilizers or those specifically formulated for tomatoes (which typically have higher phosphorus and potassium relative to nitrogen). Apply according to label directions, and remember that if you’ve amended your soil with compost, you may need less supplemental fertilizer than you think.
Maintain Proper Soil pH
As mentioned earlier, the ideal soil pH for tomatoes is between 6.2 and 6.8. In this range, calcium and other nutrients are most available to plants. If your soil is outside this range, nutrients can become chemically bound in forms that roots cannot absorb—even if a soil test shows they’re present.
Regular soil testing every 2-3 years helps you track pH changes and make adjustments before problems arise.
Use Raised Beds or Ensure Container Drainage
Raised bed gardening offers several advantages when it comes to preventing blossom end rot. Raised beds warm up faster in spring, drain better than in-ground beds, and allow you to have complete control over soil composition and quality.
If you’re growing tomatoes in containers, ensure pots have adequate drainage holes and use high-quality potting mix (not garden soil, which compacts in containers). Container tomatoes need more frequent watering because they dry out faster, making consistent watering even more critical.
Remove Affected Fruit
When you spot tomatoes with blossom end rot, pick them off and compost or discard them. The plant has already invested energy into fruit that won’t recover, and removing them allows the plant to redirect that energy into developing healthy new fruit.
This won’t cure the underlying problem, but it helps the plant focus its resources more efficiently while you address the root causes.
Best Natural Prevention Tips for Future Crops
Prevention is always easier than treatment. Here are strategies to implement before and during the growing season to prevent blossom end rot from appearing in the first place.
Choose Resistant Tomato Varieties
Not all tomatoes are equally susceptible to blossom end rot. Some varieties are simply more prone to it than others. While no tomato is completely immune, choosing varieties with better resistance can reduce your risk significantly.
Generally, smaller-fruited tomatoes like cherry and grape types rarely develop blossom end rot. Among larger varieties, look for those specifically noted for disease resistance or resilience in your region. Your local extension office or experienced gardeners in your area can recommend varieties that perform well in your specific climate and soil conditions.
Space Plants Properly
Overcrowded tomato plants compete for water, nutrients, and sunlight. Proper spacing improves air circulation, reduces humidity around plants, and ensures each plant has adequate access to soil resources.
For determinate (bush) varieties, space plants 24 to 30 inches apart. For indeterminate (vining) varieties, allow 36 to 48 inches between plants. If you’re using cages or trellises, follow spacing recommendations for your specific support system.
Avoid Root Disturbance
Tomato roots are sensitive, and damage to the root system directly impacts the plant’s ability to uptake water and calcium. When transplanting seedlings, handle root balls gently. Once plants are established, avoid deep cultivation or hoeing close to the stem.
Instead of hoeing weeds, pull them by hand or use mulch to suppress weed growth naturally. This protects the root zone while keeping your garden tidy.
Water at the Base of Plants
Overhead watering wets foliage, which can promote fungal diseases like blight and leaf spot. It also wastes water through evaporation before it reaches the root zone.
Water at the base of plants using a soaker hose, drip irrigation, or a watering wand directed at the soil surface. This delivers moisture exactly where roots can use it while keeping leaves dry. Drip irrigation on a timer is one of the best investments you can make for watering tomatoes properly and consistently.
Build Organic Matter Into Soil Structure
Healthy soil is living soil. Regularly adding organic matter—compost, aged manure, cover crops, leaf mold—improves soil structure over time. Well-structured soil holds moisture without becoming waterlogged, allows roots to penetrate easily, and provides a reservoir of slow-release nutrients.
Make organic matter additions a regular part of your garden maintenance routine, not just a one-time event before planting. Top-dress beds with compost annually, grow cover crops during off-seasons, and use organic mulches that break down into the soil.
Monitor Weather Stress and Respond Proactively
Pay attention to weather forecasts and adjust your care accordingly. During heat waves, you may need to water more frequently or provide temporary shade cloth. Before heavy rains, ensure drainage is adequate. After cold snaps, watch for stress symptoms.
Being proactive rather than reactive helps you maintain the stable growing conditions that tomatoes need to thrive.
Common Mistakes to Avoid
Even well-intentioned gardeners can inadvertently make blossom end rot worse. Watch out for these common errors.
Watering Inconsistently
This is the number one mistake gardeners make. Letting soil dry out completely between waterings—or watering too frequently without allowing the soil to drain—creates the exact conditions that trigger blossom end rot. Develop a regular watering schedule and stick to it.
Assuming It’s Only About Calcium
Many gardeners immediately assume blossom end rot means their soil lacks calcium and start adding lime, eggshells, or calcium sprays without testing their soil first. Often, calcium is already present but unavailable due to watering issues or pH problems. Don’t treat blindly—test your soil and address the real cause.
Adding Too Much Fertilizer
The “more is better” mentality with fertilizer can backfire spectacularly. Excessive nitrogen creates lush foliage but weak fruit development. Follow recommended application rates and err on the side of less rather than more.
Letting Plants Dry Out Completely
Tomatoes are somewhat drought-tolerant once established, but drought stress during fruit development is a recipe for blossom end rot. If you see plants wilting in the afternoon heat, they’re telling you they need water. Don’t wait until morning to address it.
Planting in Compacted Soil
Compacted soil restricts root growth and water movement. Before planting, loosen soil to a depth of at least 12 to 15 inches. In heavy clay soils, consider raised beds or amend extensively with compost to improve structure.
Frequently Asked Questions
Can blossom end rot be reversed?
Unfortunately, no. Once a tomato fruit has developed blossom end rot, that specific fruit cannot be healed or reversed. The damaged cells are dead and will not recover. However, you can prevent future fruits on the same plant from developing the disorder by correcting the underlying growing conditions. Focus on consistent watering, proper mulching, and soil improvement, and you should see healthy fruits develop going forward.
Should I remove tomatoes with blossom end rot?
Yes, it’s best to remove affected fruits promptly. Pick them off the plant and dispose of them in your compost pile or trash. This prevents secondary rot organisms from spreading and allows the plant to redirect energy toward developing new, healthy fruit. The plant itself is not diseased, so there’s no risk of “contaminating” other plants by leaving the affected fruit.
Do crushed eggshells help with blossom end rot?
This is a popular gardening myth with a grain of truth. Eggshells do contain calcium carbonate, but they break down extremely slowly in soil—often taking years to decompose enough to release calcium in plant-available forms. Adding crushed eggshells at planting time won’t solve an active blossom end rot problem because the calcium won’t be available quickly enough.
For faster results, use gypsum (calcium sulfate) or agricultural lime based on soil test results. You can still add eggshells to your compost pile as a long-term soil amendment—just don’t rely on them as an emergency treatment.
Is blossom end rot caused by lack of calcium?
Yes and no. Calcium deficiency in tomatoes is involved in the development of blossom end rot, but it’s usually a localized deficiency within the fruit, not necessarily a deficiency in the soil. The plant may have plenty of calcium available, but inconsistent watering, root damage, or environmental stress prevents it from being transported to developing fruits. This is why simply adding more calcium to the soil often doesn’t solve the problem—you need to address the underlying transport issue through proper watering and growing conditions.
Can container-grown tomatoes get blossom end rot?
Absolutely. In fact, container-grown tomatoes can be more susceptible to blossom end rot because pots dry out faster than in-ground soil, making consistent watering more challenging. To prevent problems in containers, use large pots (at least 5 gallons for determinate varieties, 10+ gallons for indeterminate), high-quality potting mix, mulch the surface, and water more frequently—sometimes daily during hot weather. Self-watering containers or drip irrigation systems can be especially helpful for maintaining consistent moisture.
Conclusion
Blossom end rot can feel like a heartbreaking setback, especially when you’ve invested time and care into your tomato plants. But here’s the reassuring truth: it is one of the most preventable and manageable tomato plant problems you’ll encounter.
By understanding that blossom end rot is a physiological issue rooted in calcium transport—not a disease or pest—you can approach it with the right mindset and tools. Focus on the fundamentals: consistent watering, generous mulching, healthy soil, proper spacing, and balanced nutrition. These natural, organic practices don’t just prevent blossom end rot—they create the conditions for vigorous, productive plants that reward you with abundant harvests.
Remember that early-season fruits are most commonly affected, and problems often resolve themselves as plants mature and summer conditions stabilize. Don’t give up on your tomato plants after seeing a few damaged fruits. Remove the affected ones, double down on proper care, and watch as healthier fruits develop.
Gardening is always a learning process, and every season teaches us something new. With the knowledge and strategies outlined in this guide, you’re well-equipped to grow beautiful, delicious tomatoes naturally—without reaching for synthetic chemicals or expensive treatments.
Your garden, your soil, and your tomatoes will thank you. Happy growing!
Quick Reference: Your Blossom End Rot Action Plan
| Action | Purpose |
|---|---|
| Water 1-1.5 inches per week consistently | Maintains calcium uptake |
| Apply 2-4 inches of organic mulch | Stabilizes soil moisture |
| Test soil pH (aim for 6.2-6.8) | Ensures nutrient availability |
| Add compost to beds annually | Improves soil structure |
| Water at base, not overhead | Reduces disease risk |
| Space plants properly | Improves air circulation |
| Remove affected fruits | Redirects plant energy |
| Avoid excess nitrogen fertilizer | Prevents nutrient imbalance |
Have you battled blossom end rot in your garden? What natural methods worked best for you? Share your experiences and tips in the comments below!